Print And Output
Print and output functions pass project information on as a report, PDF, Excel file, or export file.
Print A View
A view can be printed when it contains the desired information.
Typical procedure:
Open a suitable view.
Check the header and footer.
Adjust the display, columns, and timescale.
Open File > Print.
Check the print preview.
Print, or output as PDF through a PDF printer.
Typical Output Targets
paper print
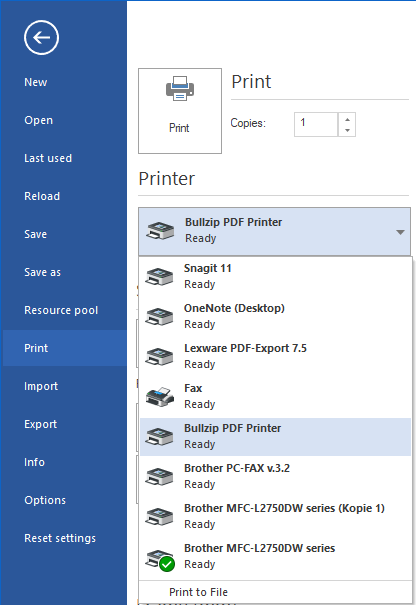
PDF printer
Excel export from the active view
MS Project XML export
XML export
iCalendar output through Integration Server
PDF Output
A PDF printer is used for a PDF file. Prepare the view as for printing and select the PDF printer in the print dialog.
Excel Output
Views can be output to Excel. Before the export, check filters, structure, timescale, and visible columns.
Suitable views:
activity views
resource views
capacity views
portfolio evaluations
Reports
Reports should not just export data but support a decision. Therefore, before output check:
target group
time period
project or portfolio
relevant resources
visible columns
status, baseline, or cut-off date
Configure The Print View
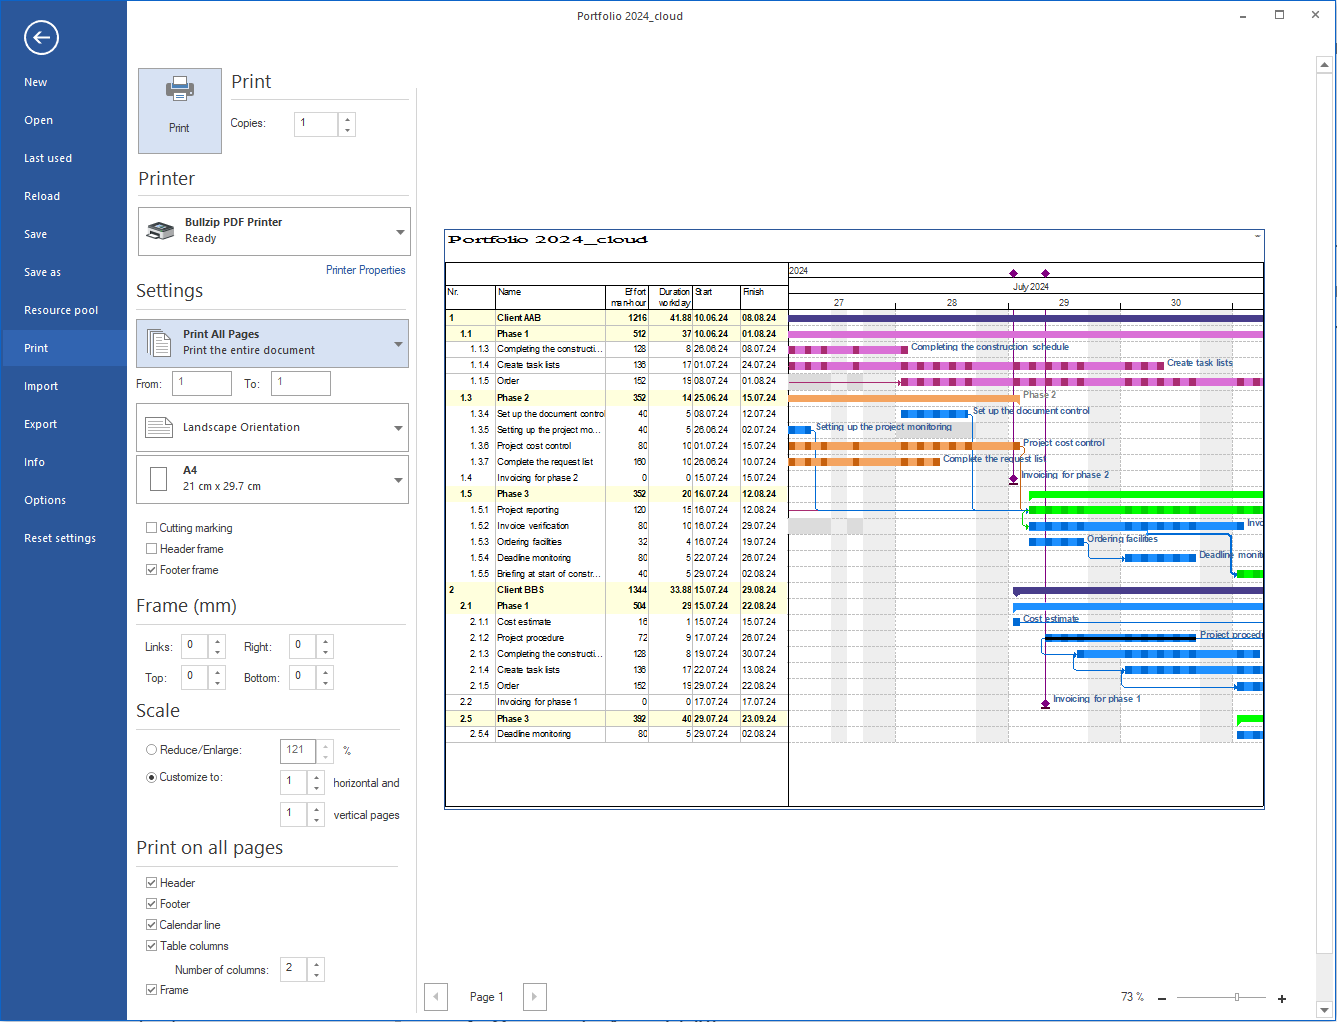
The print view defines how the printout of a view appears on paper. You configure it in the File > Print dialog, which combines print settings and a preview window.
Page format:
Setting |
Meaning |
|---|---|
Paper format |
A4, A3, or user-defined formats. |
Orientation |
Portrait or landscape. |
Margins |
Distance from the print content to the paper edge, configurable for all four sides. |
Scaling |
Reduce content by percentage or scale to a specific number of pages. |
Header and footer:
The header and footer can contain fixed texts as well as dynamic fields:
project name and project code
date and time of the print output
page number and total number of pages
user-defined text
Open: in the File > Print dialog; pre-set permanently via the project properties, Headers and footers tab (Start > Properties > Project), so that all printouts of this project are labelled consistently.
Adjust the timescale:
In the print dialog the printed period can be restricted:
only the visible period of the current view
a freely definable date range
the entire project period
Columns and display:
The printed columns correspond to the columns visible in the current view. Adjust the view before printing via the Format tab of the view (block Data > Columns, for example Bar chart Format > Data > Columns).
Print preview:
The print preview is part of the File > Print dialog and shows the result of the current settings before printing. In the same dialog you adjust the scaling (Scale area) and the print range (Pages area).
Print A Holiday Report
A holiday report shows the non-working days of the employees (vacation, sickness, other absences) for a period. It is created from the Personnel resource view.
Prerequisite: the non-working days must be entered for the employees in the resource pool.
Procedure:
Create a project with a start and finish that define the report period (for example 01.01. to 31.12.).
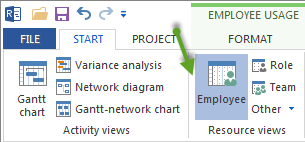
Open the resource view via Start > Resource views > Personnel.
Structure the employee list via Start > Outline > Structure, for example Team > Personnel.
Set the timescale, for example Day 1:1.
Check the columns via the Format tab Personnel utilisation Format > Data > Columns.
Open Start > Edit > Filter and disable the option Offer only already planned resources for selection so that all employees appear.
Choose File > Print and define the print settings.
Typical use:
print absence overviews for team meetings or personnel planning
output an annual calendar for resource pool employees as a reference
use vacation overviews as an attachment for status or project reports
Note: absences must be maintained in the resource pool so that they appear in the holiday report. More on this: Maintain Working Times and Non-Working Days