Set and adjust employees
The employee management in Rillsoft Project is very flexible. You can assign several different roles, team memberships, costs and productivity to employees.
Note: We recommend you to create teams before you define employees.
In order to set and adjust employees,do as follows:
Select the menu item Start > Properties > Resource.

The dialogue box Resource pool opens.
Select the tab Employees.
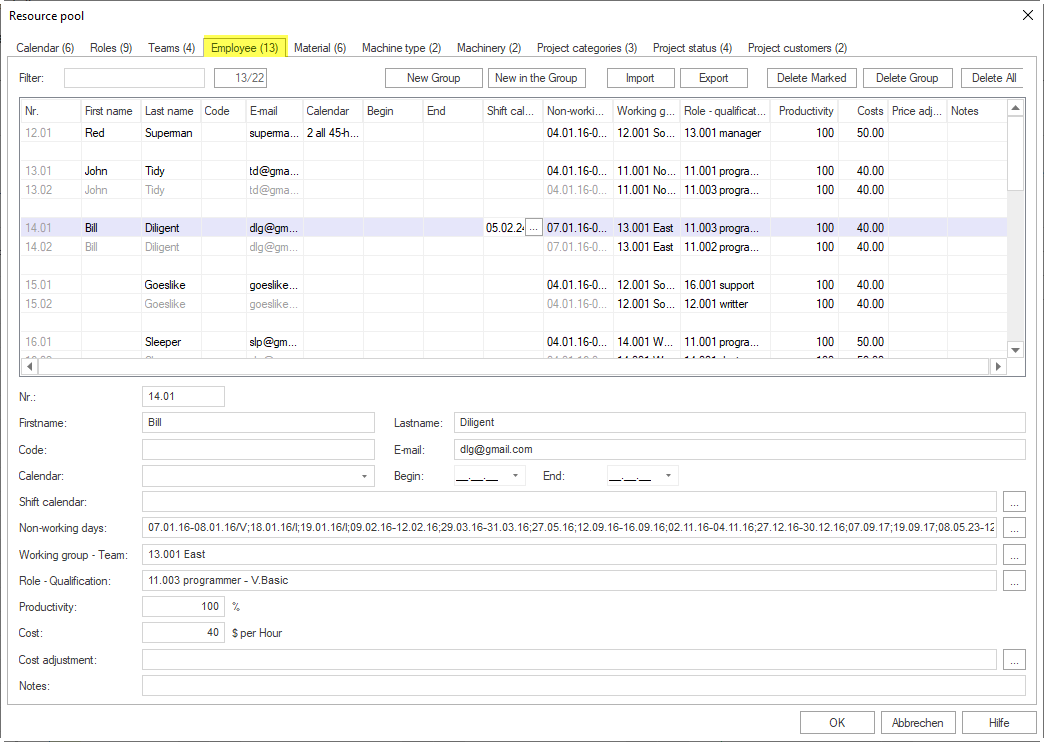
Create a new group or a new employee by clicking on the button New group or on the row that is marked with an asterisk (*), enter a new employee name in the column Name.
Enter the property of an employee (a new role or team membership) in this group in the row (columns Working group – team and Role - qualification). You can enter additional properties of the employee directly in the empty row below the column Working group - team and Role - qualification, while the group description is automatically copied. Note: In order to change the group name, at first you need to do this in the first group row, which automatically transfers the group name to all the other saved material types.
Enter a specific value in the column Code to exchange data with other applications.
Enter an Email address of the employee in the column Email.
From the drop down list Calendar select the calendar that should be applied for this employee. If you have not selected a calendar, the program searches for a valid calendar in the following order: Team calendar, Activity calendar and Project calendar.
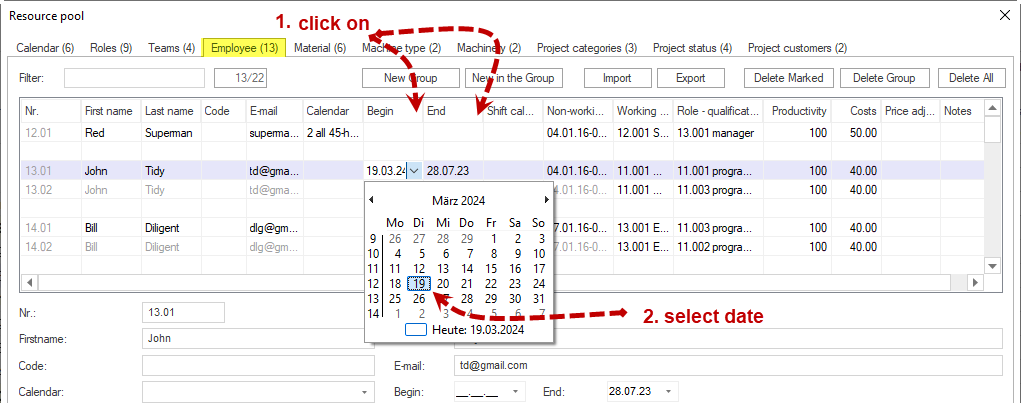
Enter the date the employee has entered the company in the field Entry.
Enter the date the employee has left the company in the field Leaving.
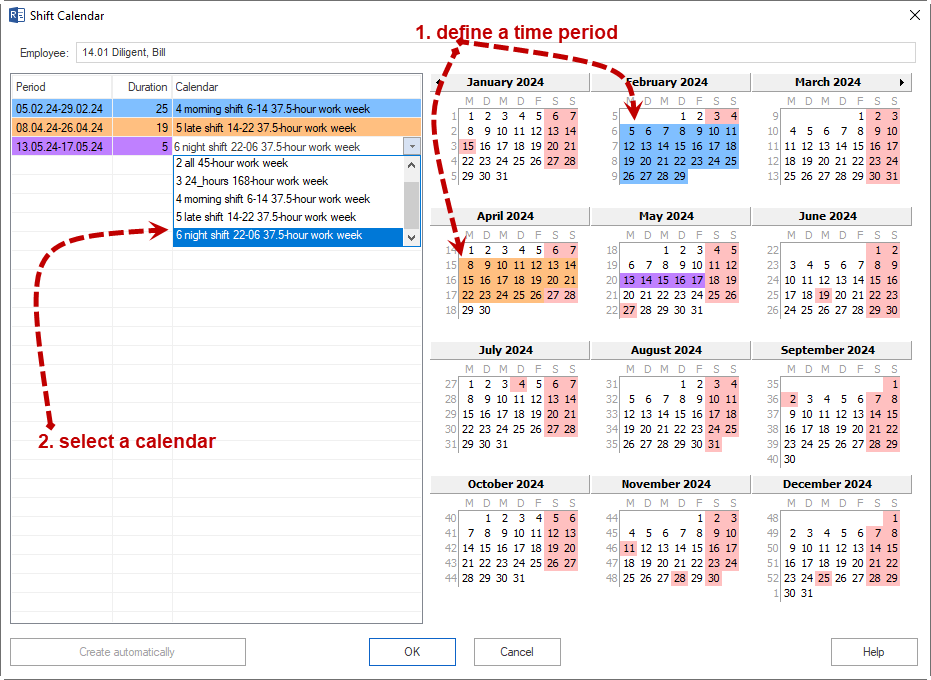
Click in the Shift calendar field if an employee is to work at different times according to different calendars. First select a time period for a work calendar by holding down the left mouse button. Then select a desired calendar for this time. The prerequisite is that the calendars to be selected should have been created in the resource pool on the Calendar tab.
Enter the non-working days of the employee (job trainings, workshops, etc.) in the field Non-working days. Note: The entered non-working days will be added to those defined in the team. (Example for a definition of non-working days: 18.03.05-22.04.05; 25.05.05; 08.06.05-17.06.05).
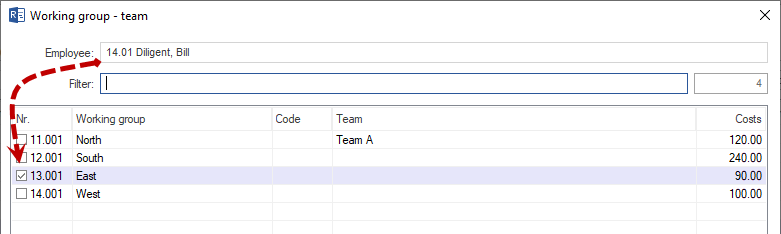
Select the team which you want the employee to be assigned to in the drop down list Working group - team.
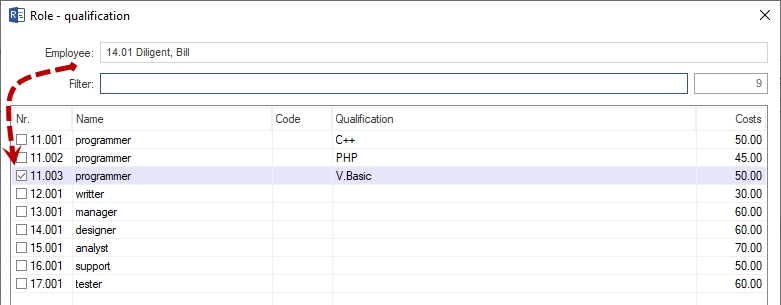
Select the role which you want to assign to the employee in the drop down list Role - qualification.
Enter a different value for the calculated productivity of an employee in percent in the field Productivity.
Enter a different value for the calculated hourly rate of an employee (for instance, from the role definition) in the field Costs.
After a particular date, you can enter either a coefficient for an existing unit price or a new unit price per hour of the employee in the field Cost adjustment.
If necessary, enter a note in the field Notes.
Click on the button OK.
Assign additional roles, teams, costs and productivity to an employee
If you want to assign a different role along with its different cost rate to an employee, do as follows:
Enter the different value in the row of the employee directly below (no asterisk) in the corresponding column. Caution: Make sure not to define this employee in another row, which features an asterisk, because this may cause inconsistencies within the project.
Import / export of employees
Click on the button Export to export a resource to a TXT file or on the button Import to import resources.
Import / export fields:
[ID]
[First Name]
[Last Name](required field)
[Code]
[Email]
[Calendar]
[Entry date]
[Leaving date]
[Non-working days]
[Team]
[Role]
[Productivity]
[Costs]
[Cost adjustment]
[Notes]
The individual fields are separated by a hash key “#”.
The number you want to import from “#” symbols in imported txt file must always be 14. If more or less “#” symbols are registered, you will get an error message
Example of an import file (only employee names and the corresponding hourly rates are imported):
#MA-1#N-MA-1#1000001#MA1.NMA1@musterfirma.com######11.001 Team 1#11.001 Role 1####
oder
#MA-1#N-MA-1#1000001#MA1.NMA1@musterfirma.com###########
Note:
You can search for employees in the field Filter. Enter the search phrase (or a part of it) in the field.